Document Actions
gvSIG-Desktop 1.1. Manual de usuario.
The locator is a general map which is displayed in the bottom left hand corner of the view's window. It is used to show the working area (main window zoom). Click on “View” in the menu bar and select “Configure locator map”.
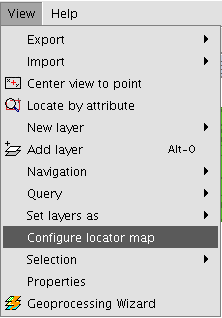
A window appears in which we can add layers (we can add the same types of layers as in the view) which will make up part of the locator map. This window can also be used to remove layers or edit the layers’ legends.

When you click on the “Add layer” button, the following window appears
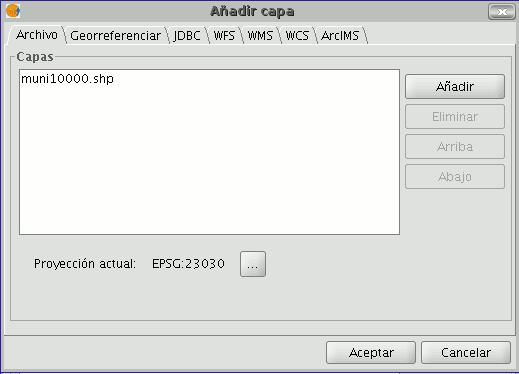
This new function allows the layer loaded in the locator map to be reprojected. To do this, click on the button next to “Current projection when you have selected the layer you wish to load in the locator map.
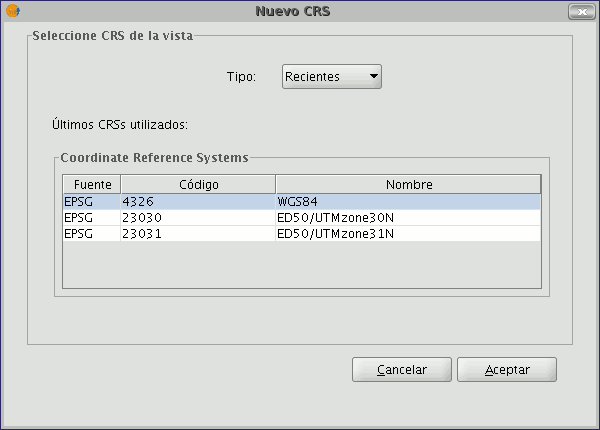
In the following window, select the reference system you wish the layer to have in the locator map and click on “Finish” for the changes to take effect.